Discover Lesser-known Tropical Peaks
The Philippines is a tropical paradise renowned for its stunning beaches, lush jungles, and vibrant culture. But beyond its coastal beauty lies a treasure trove of untouched wilderness, including virgin peaks waiting to be explored. Climbing a virgin peak offers adventurers a unique opportunity to connect with nature, discover hidden gems, and push their limits. In this guide, I will delve into the steps to successfully conquer a virgin peak in the tropical wonderland of the Philippines.
STEP 1. Download a GPS App to Your Smartphone
Download a GPS app to your smartphone and use it to identify potential targets for your expedition. Here are just some GPS apps that I used in my previous expeditions:
- Google Maps
- Gaia GPS
- OutdoorActive
- AllTrails
STEP 2. Learn To Read Topographic Maps and Satellite Imagery
Familiarize yourself with the basics of reading topographic maps: Topographic maps or 'topomaps' depict the three-dimensional terrain of the Earth's surface in a two-dimensional format. Learn to identify other map features such as ridges, valleys, peaks, and water bodies, which can aid in route planning and navigation during your climb.
- Squiggly lines called contour lines represent elevation changes, with each line indicating a constant elevation level.
- Contour lines that are close together indicate steep terrain
- Contour lines lines that are spaced farther apart indicate gradual slopes.
- Ridge: Depicted by closely spaced contour lines forming a V-shape.
- Valley: Represented by closely spaced contour lines that form a U-shape.
- Peak: The highest point on a mountain or hill that are represented with concentric contour lines.
- Saddle: Low area between two peaks and appears like an hour-glass shaped contour lines.
- River or stream: Represented by blue lines.
For more details about topographic maps, click here.
Familiarize Yourself with Satellite Imagery: Use the satellite image feature of the GPS app to familiarize yourself with the terrain and vegetation cover along your intended route.
- Dark green areas typically indicate dense vegetation.
- Lighter shades suggest grassy or open terrain.
This visual information helps you identify potential obstacles and plan your route accordingly.
STEP 3. Choose Your Peak
In the GPS app's Topo Mode, select a peak by identifying concentric contour lines that rise prominently above the surrounding terrain. Generally, peaks have a minimum elevation of 300 meters or around 1,000 feet.
STEP 4. Determine Whether the Peak Remains Unclimbed
Few things are as disheartening as believing you've stumbled upon an unclimbed peak, only to realize it's already been traversed due to the presence of trails or signs of human activity. Here are some of my ways to check if the peak remains unclimbed:
- Google: If the peak in question has a name indicated on the topomap, google it. Research historical accounts and expedition reports to ascertain if any documented climbs have been made on the peak.
- Satellite Imagery: If you cannot find it in Google, use the GPS app and switch to satellite mode to scrutinize the terrain for any signs of existing trails or human activity. Look for inhabited areas or villages near the peak.
- Join online forums or chatrooms: Exercise caution when joining online forums and chat groups as they can be unreliable sources of information, potentially causing confusion and leading to misleading conclusions.
- Ground survey or 'Recon': This is probably the most reliable way to gather information about the peak. Go directly to the inhabited area or village near the peak and talk to its local authorities. Ask permission to conduct ground surveys, exploring the base and surrounding areas of the peak to look for any indications of prior ascents such as crude trails, campsites, or discarded equipment. Moreover, scout the area for suitable parking facilities or accommodations where you can safely leave your vehicle and begin your trek. Consider factors like security, availability of amenities, and local regulations.
MARK AND SAVE IMPORTANT COORDINATES
Use your GPS app to mark and save coordinates of important locations during your ground survey. These locations may be a point on the road or village which may be crucial in choosing a good jump-off point or starting point.
STEP 5. Choose a Strategic Jump-Off Point
Select a jump-off point that is strategically located near infrastructure such as roads or the village where you conducted ground survey. This ensures convenient access to transportation and facilitates logistics for your expedition.
STEP 6. Plot a Route from Jump-off Point to the Peak
Using the drawing or route-planning tool provided by the GPS app, plot a route (line) linking your chosen jump-off point to the peak. This is where your knowledge in reading topographic map and satellite imagery come into play.
- Trace a route that avoids densely vegetated areas and steep inclines. Aim to follow clearings, ridgelines, or existing trails whenever possible, as these paths often offer the path of least resistance.
- Review and Save Your Route: Once you've plotted your route, review it carefully to ensure it aligns with your objectives and preferences. Double-check for any potential obstacles or hazards along the way. Make adjustments if necessary. Save your route within the GPS app for easy access during your expedition.
STEP 7. Estimate the Difficulty of Your Planned Route
Assessing the difficulty of your intended route is crucial to ensure a safe and enjoyable journey. Consider the following factors when estimating the difficulty of your route:
- Distance: Consider the length (automatically calculated by GPS app) of your planned route as a key factor in estimating its difficulty. Longer routes typically require more time, endurance, and stamina to complete. Evaluate the distance of your ascent from the jump-off point to the peak, as well as any additional mileage for return or loop routes.
- Elevation Gain: Assess the total elevation gain (automatically calculated by GPS app) along your planned route , which refers to the cumulative vertical ascent from the starting point to the summit. Steeper elevation gains typically result in more strenuous climbs and increased exertion. Use the topographic map in your GPS app to identify sections of the route with significant elevation changes and gauge the overall difficulty level accordingly.
- Vegetation Density: Evaluate the density of vegetation, particularly the undergrowth, along your planned route as it can significantly impact the difficulty of the climb. Dense vegetation may obstruct visibility, impede progress, and increase the effort required to navigate through the terrain. Utilize satellite imagery and terrain analysis features in your GPS app to identify areas with dense vegetation and factor this into your estimation of route difficulty.
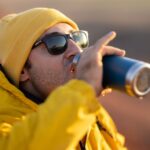
- Availability of Water Sources: Check the availability of water sources along your route. Access to clean water is crucial for hydration, especially in tropical climates. Identify reliable sources such as streams, springs, or lakes, and plan your hydration strategy accordingly.
- Terrain Conditions: Take into account other terrain conditions that may affect the difficulty of your climb, such as uneven terrain, rocky surfaces, stream crossings, or exposed sections. Assess the technical challenges posed by the terrain and consider your own skill level and experience in navigating similar conditions.
- Weather and Environmental Factors: Consider external factors such as weather conditions, time of day, and environmental hazards that may affect the difficulty and safety of your climb. Be prepared for changes in weather patterns, temperature fluctuations, and potential risks such as rain, fog, or high winds.
Unlike hiking on established trails, which typically allows for a pace of 2 to 3 kilometers per hour, navigating through thick undergrowth and dense vegetation significantly slows down progress. Expect a much slower pace of 1 kilometer or less per hour when hacking through dense vegetation.
STEP 7. Prepare Essential Gear and Supplies
Once you've estimated the difficulty of your planned route and assessed the specific challenges you may encounter, it's crucial to prepare the necessary gear and supplies. Here's what you'll need: